Creating a realistic 3D house drawing can seem daunting. Still, with the right techniques and tools, it becomes an enjoyable and rewarding experience. Whether you’re an aspiring artist, architect, or hobbyist, this guide will walk you through how to draw a house 3D step by step. By the end, you’ll have a stunning, lifelike drawing that pops off the page! Let’s dive into the details.
Why Realistic 3D House Drawings Matter
Have you ever looked at a beautiful sketch of a house and felt captivated by its lifelike details? Realistic 3D drawings bring depth, perspective, and character to your work, making it more engaging and professional. Whether you want to showcase your architectural ideas, improve your art portfolio, or impress your friends on social media, mastering this skill is invaluable.
Did you know that searches for “how to draw a luxury house 3D” increased by 40% in 2025? This growing interest highlights the importance of creating drawings that stand out. So, grab your tools and let’s bring your sketches to life!
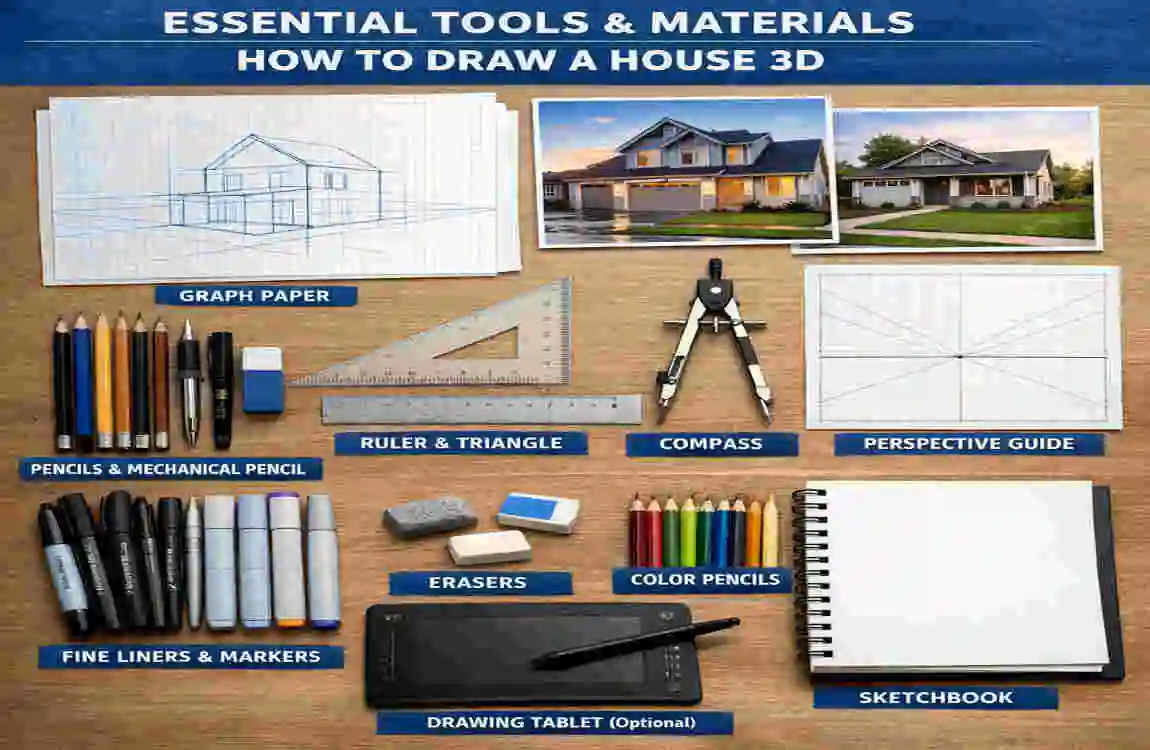
Essential Tools and Materials
Before jumping into the step-by-step guide, let’s ensure you have the right supplies. While professional tools can enhance your results, beginners can start with affordable alternatives.
Recommended Tools
Tool Best For Price Range Alternatives
Pencils (HB-6B) Shading depth $5-10 Mechanical pencils
Ruler/Set Square Straight lines and perspective $10 Freehand for experts
Kneaded Eraser Clean highlights $3 Vinyl erasers
Paper (Bristol) Smooth, professional finish $15/pack Sketchbook
Digital Software 3D modeling and exports Free Blender (advanced)
Mastering Perspective Basics
Understanding perspective is the foundation of any great 3D drawing. Without perspective, even the most detailed sketch can look flat and unrealistic.
Types of Perspective
- One-Point Perspective:
- Use one vanishing point on the horizon line.
- Ideal for straight-on views of a stunning house.
- Two-Point Perspective:
- Incorporates two vanishing points for more dynamic angles.
- Perfect for drawing corners or angled views of a house.
- Three-Point Perspective:
- Adds a third vanishing point (above or below the horizon).
- Best for dramatic or towering views, such as skyscrapers.
Quick Tips for Perspective
- Start with a Horizon Line: This represents your eye level.
- Add Vanishing Points: Use them to guide your lines and create depth.
- Check Roof Angles: Rooflines should always recede toward the vanishing points.
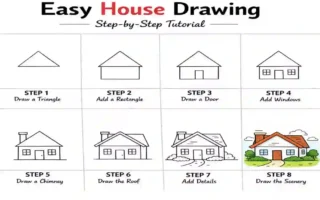
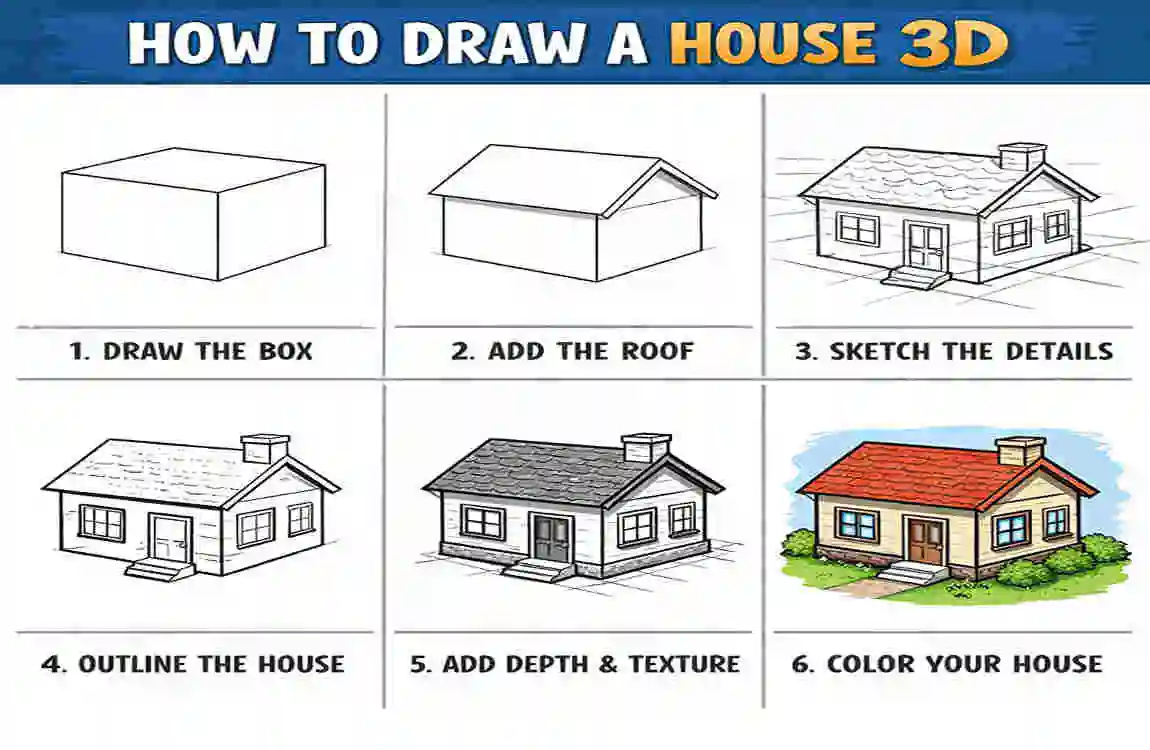
Step-by-Step: How to Draw a House 3D
Now that you have the tools and understand perspective, let’s start drawing! Follow these 10 simple steps to create a realistic 3D house.
Sketch the Base Rectangle
Begin by drawing a flat rectangle. This will act as the foundation of your house.
Add Side Walls for Depth
Extend lines from the rectangle toward your vanishing points. This gives your house its 3D shape.
Build the Roof Triangle
Draw a triangle on top of your rectangle to represent the roof. Make sure the lines angle back to the vanishing points for accuracy.
Insert Door and Windows
Sketch small rectangles for doors and windows on the front face. To make them realistic, ensure they are slightly recessed.
Outline Chimney and Path
Add a roof, a chimney, and a path leading to the door. These small details add personality to your drawing.
Refine Edges with a Ruler
Go over your lines with a ruler to make them crisp and clean.
Apply Basic Shading
Decide on a light source (e.g., top-left). Shade the areas opposite the light to create depth.
Texture Walls (Brick/Wood)
Use cross-hatching or horizontal lines to create the appearance of bricks or wooden planks.
Detail Roof Shingles
Add overlapping V-shaped lines on the roof to represent shingles.
Landscaping Touches
Finish off with bushes, trees, or a fence to add context and realism.
Shading Techniques for Realism
Shading is where your 3D house truly comes to life. It adds depth and dimension, making your drawing look professional.
Types of Shading Techniques
Technique Effect on 3D House Drawing Difficulty
Hatching adds texture (e.g., wood siding). Beginner
Cross-Hatching Enhances shadow depth Intermediate
Blending creates smooth gradients. Advanced
Tips for Shading
- Use hatching for areas like walls and siding.
- Blend with a tissue or blending stump for soft shadows.
- Place highlights on the side facing your light source.
Texturing and Detailing Secrets
Walls: Brick or Wood Patterns
- For bricks, draw evenly spaced horizontal lines, then add vertical lines to create the brick pattern.
- For wood, use slightly uneven horizontal lines to mimic the grain texture.
Roof: Shingles
Draw overlapping V-shapes or curved lines to represent shingles. This small detail adds depth and realism.
Windows: Glass Reflections
Add diagonal lines or subtle shading to mimic reflections on the glass.
Pro Tip: Use reference photos to ensure accurate textures. This can boost the realism of your drawings by 50%!
Common Mistakes to Avoid
Even experienced artists can make mistakes. Here are some common pitfalls to watch out for:
- Flat Roofs: Always angle rooflines to match the perspective.
- Uneven Shadows: Keep your light source consistent throughout.
- Over-Symmetry: Add asymmetry (e.g., a tree or uneven windows) to make your drawing look natural.
- Skipping Measurements: Use grid paper for accuracy, especially when starting.
Digital vs. Traditional 3D Drawing
Should you draw traditionally or use digital tools? Let’s weigh the pros and cons.
MethodProsCons
Traditional Tactile, no learning curve, Harder to edit
Digital Undo, layers, easy exports, and software cost
Recommendation: Beginners can start with traditional tools, while advanced users might explore free digital tools like SketchUp.
Advanced Realism Tips
Ready to take your drawing to the next level? Try these advanced techniques:
- Lighting: Use multiple light sources to create dramatic effects.
- Study Real Materials: Observe real houses to recreate authentic textures.
- Post-Processing: Scan your drawing and enhance it digitally using tools like Photoshop.
FAQs
How long does it take to learn how to draw a 3D house?
With consistent practice, you can grasp the basics in 1-2 hours.
What’s the best software for beginners?
SketchUp Free is an excellent choice for digital beginners.
Can kids try this?
Absolutely! Simplify the steps and encourage creativity.
What’s the easiest perspective to start with?
One-point perspective is beginner-friendly and straightforward.
Do I need expensive tools?
Not at all! Basic supplies like pencils and paper work just fine.