Turning 18 is a huge milestone—it’s the age when teens officially step into adulthood. Naturally, this life-changing moment deserves a celebration that’s just as special. But here’s the catch: not everyone has the budget for a fancy event hall or professional decorators. That’s where DIY 18th birthday decorations at home come in!
Imagine this: your living room transformed into a magical party space with glittering fairy lights, a stunning balloon arch, and a personalized photo booth—all created by you, without breaking the bank. DIY party decor is not just budget-friendly; it’s also incredibly personal. You can tailor every detail to reflect the birthday teen’s personality, favorite colors, and style.
In fact, according to the Eventbrite 2025 report, 80% of millennials and Gen Z prefer intimate DIY parties over extravagant events. Why? Because they allow for creativity, flexibility, and that all-important Instagram-worthy aesthetic.
| Idea | Materials Needed | Estimated Cost | Time to Make | Difficulty |
|---|---|---|---|---|
| Balloon Arch Backdrop | 100 balloons, fishing line, tape | $15 | 1 hour | Easy |
| Photo Booth Wall | Polaroids, fairy lights, foam board | $10 | 45 min | Easy |
| Paper Lantern Chandelier | Tissue paper, string, glue gun | $8 | 30 min | Beginner |
| Custom Neon Sign | Cardboard, LED strips, paint | $20 | 1 hour | Medium |
| Dessert Table Stands | Boxes, fabric, ribbon | $12 | 20 min | Easy |
Why Choose DIY 18th Birthday Decorations at Home?
Planning a party at home comes with tons of perks. Let’s break it down with a quick pros and cons table:
Benefit: Why It Rocks for 18th Birthdays
Budget-Friendly: Save up to 70% compared to hiring decorators.
Personal Touch Customize every detail to the birthday teen’s style.
Easy Cleanup: No need to return rentals or deal with venue rules.
Beyond the cost savings, DIY decorations let your creativity shine. Whether TikTok trends or Pinterest boards inspire you, there are endless ways to customize your decor for a one-of-a-kind celebration.
Essential Supplies for DIY 18th Birthday Decorations at Home
Before diving into the projects, you’ll need a few basic supplies. Here’s a quick checklist:
- Balloons: Latex or foil in your theme’s colors.
- Streamers and ribbons: To add movement and texture.
- Fairy lights or LED strips: Perfect for creating ambiance.
- Tape, scissors, glue gun: Basic tools for crafting.
- Eco-friendly materials: Biodegradable balloons or reusable decor items.
Stunning DIY 18th Birthday Decorations at Home
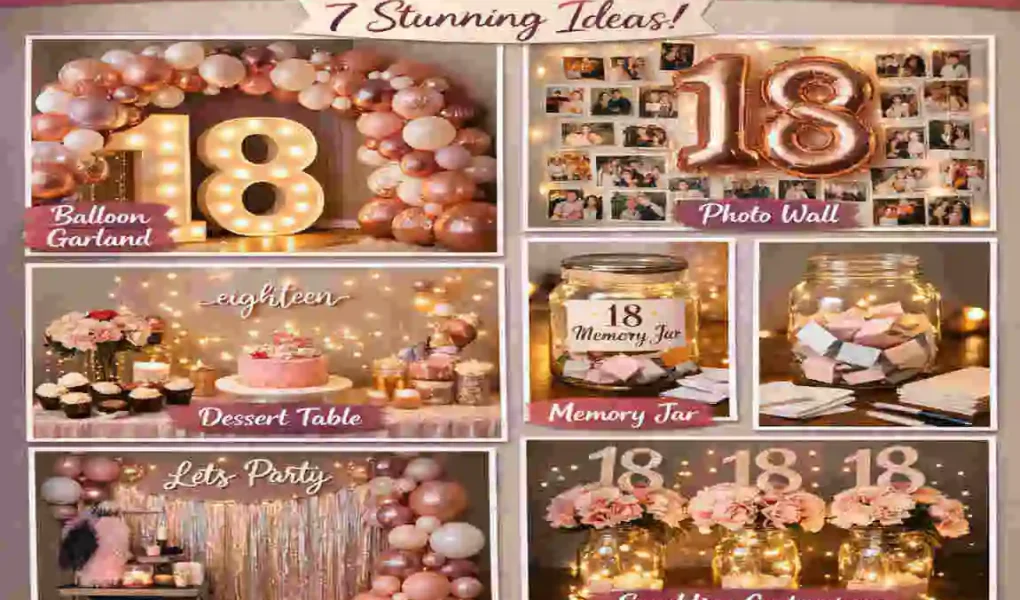
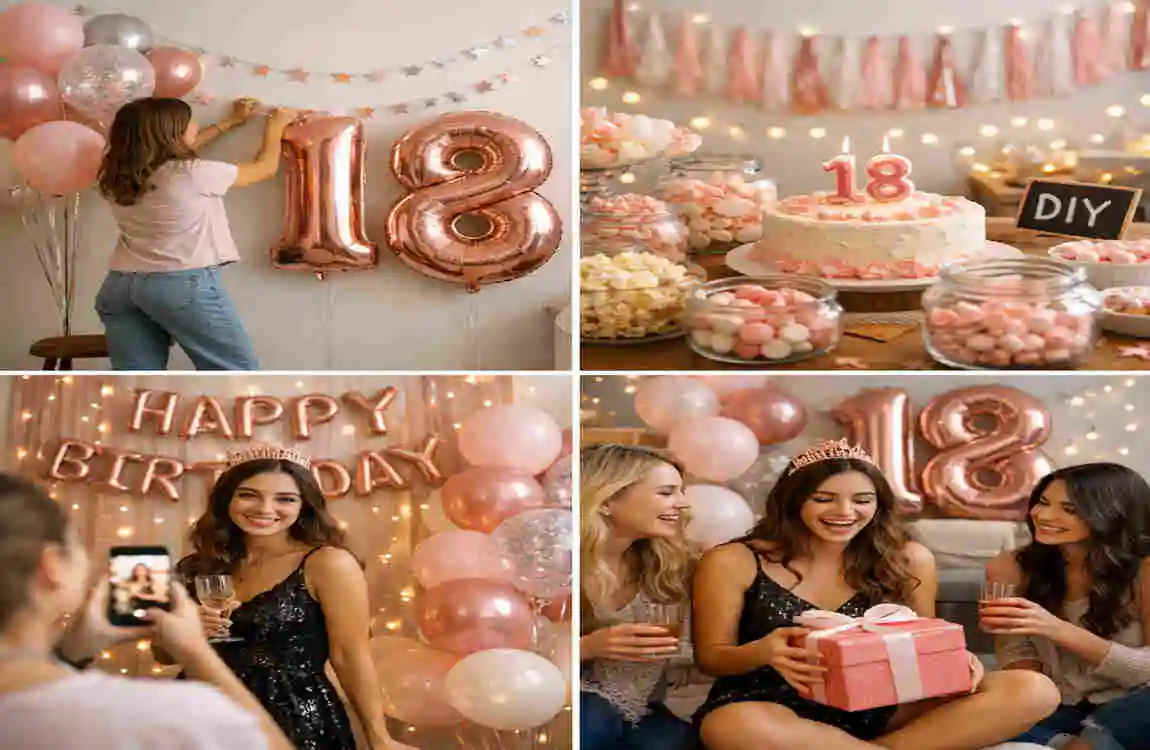
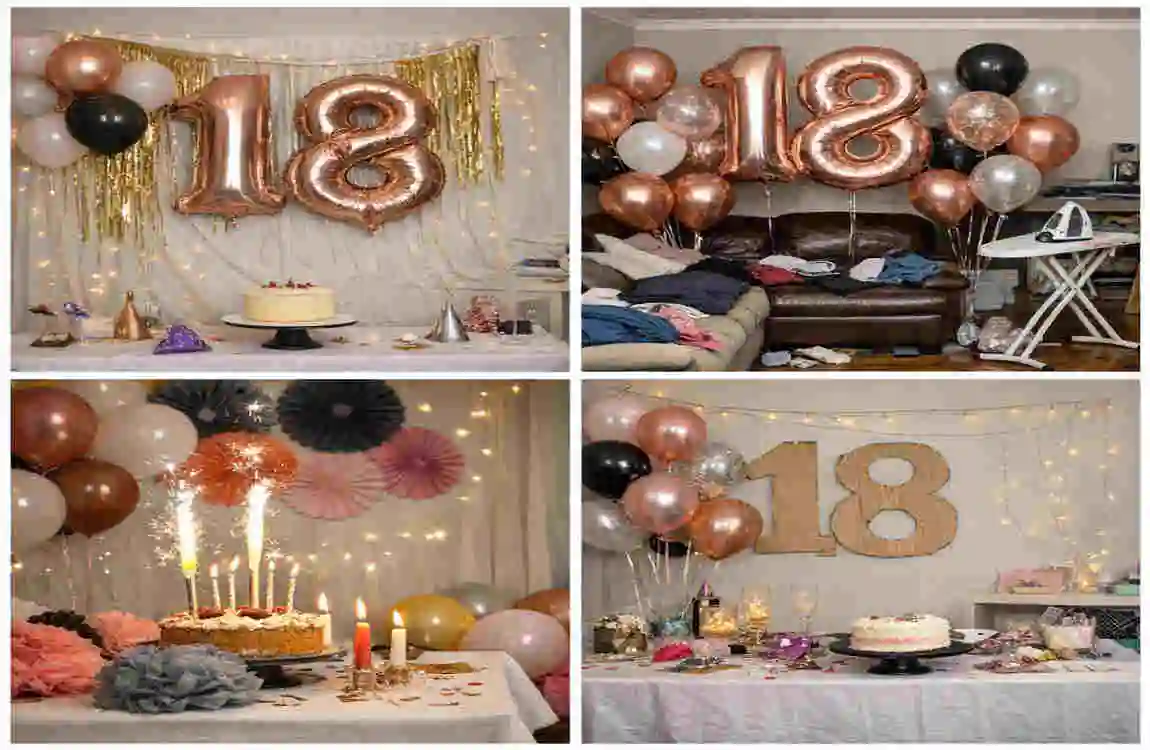
Glamorous Balloon Arch Backdrop
A balloon arch is an absolute showstopper—and surprisingly easy to make!
Steps:
- Inflate 100 balloons in two or three complementary colors (e.g., gold, black, and white).
- Use a balloon strip or fishing line to secure them into an arch shape.
- Add extra flair with metallic accents or faux greenery.
Why It’s Perfect: This backdrop doubles as a photo booth and the center of attention for the party.
Cost: Around $15.
DIY Photo Booth Wall with Polaroids
Create a photo booth wall that celebrates the birthday teen’s journey so far.
Steps:
- Print childhood photos or use Polaroid-style prints.
- Arrange them in a heart shape or timeline on the wall.
- Add fairy lights or an LED frame for extra sparkle.
Engagement Idea: Encourage guests to take pictures and share them on social media with a custom hashtag.
Hanging Paper Lantern Chandelier
Transform your ceiling with a whimsical paper lantern chandelier.
Steps:
- Cut tissue paper into lantern shapes or use ready-made paper lanterns.
- Hang them at varying heights from the ceiling or a fan.
- Mix in some string lights for a glowing effect.
Budget Hack: Repurpose wrapping paper to save even more money!
Custom Neon Sign Backdrop
Nothing screams “party” like a custom neon sign!
Steps:
- Use cardboard as the base and outline your message (e.g., “Happy 18th”).
- Attach LED light strips to the outline.
- Secure the sign to the wall or prop it up on a table.
Safety Tip: Use battery-operated LED strips for a safer, hassle-free setup.
Dessert Table with Tiered Stands
Make your dessert table the star of the show with DIY tiered stands.
Steps:
- Stack sturdy boxes and cover them with fabric or wrapping paper.
- Arrange cupcakes, cookies, and a birthday cake on the tiers.
- Add edible decor like custom cake toppers or glitter sprinkles.
Fairy Light Canopy Over the Dance Floor
Turn your living room into a magical dance floor with a fairy light canopy.
Steps:
- Attach sheer tulle fabric to the walls or ceiling.
- String fairy lights through the fabric to create a dreamy glow.
- Play some music and let the party begin!
Personalized Balloon Garland Ceiling
Elevate your decor by draping a balloon garland from the ceiling.
Steps:
- Inflate balloons in various sizes and colors.
- Use double-sided tape to attach them to the ceiling in clusters.
- Sprinkle confetti for a dazzling entrance effect.
Budget Breakdown: DIY 18th Birthday Decorations at Home Under $100
Here’s how to stay within budget:
IdeaCostTime
Balloon Arch $15 1 hour
Photo Booth Wall $10 30 mins
Dessert Table $10 20 mins
Total $75 4 hours
Tips for Executing DIY 18th Birthday Decorations at Home Like a Pro
- Match the theme: Whether it’s boho, neon, or glam, stick to 2-3 main colors.
- Lighting is key: Use dimmable lights for cozy vibes.
- Get the birthday teen involved: Let them help with crafting decorations.
Common Mistakes to Avoid in DIY 18th Birthday Decorations at Home
- Over-inflating balloons: They may pop before the party starts.
- Ignoring room flow: Ensure there’s enough space for guests to move around.
- Skipping setup time: Start decorating a day in advance to avoid last-minute stress.
FAQs: DIY 18th Birthday Decorations at Home
Q: How much do DIY decorations cost?
A: Most ideas can be done for under $100.
Q: Can I do these in a small apartment?
A: Absolutely! Use vertical space, such as walls and ceilings.
Q: Are there eco-friendly options?
A: Yes, opt for biodegradable balloons, recycled paper, and LED lights.